If you’re using Acuity Scheduling, you’re probably embedding their scheduler on your page within an iFrame. You can track leads from this setup easily with iTracker360.
Here’s how to get started.
Step 1) Add the iTracker360 JS code to your page.
Step 2) Add the iTracker360 JS code into Acuity Scheduling. You will also need to add a small piece of code above the tracking snippet as outlined below.
Login to Acuity Scheduling.
- Go to “Integrations“
- Setup the “Custom Conversion Tracking“
- Add your iTracker360 JS Snippet.
- Note: Use your tracking code, don’t copy the snippet from the sample below.
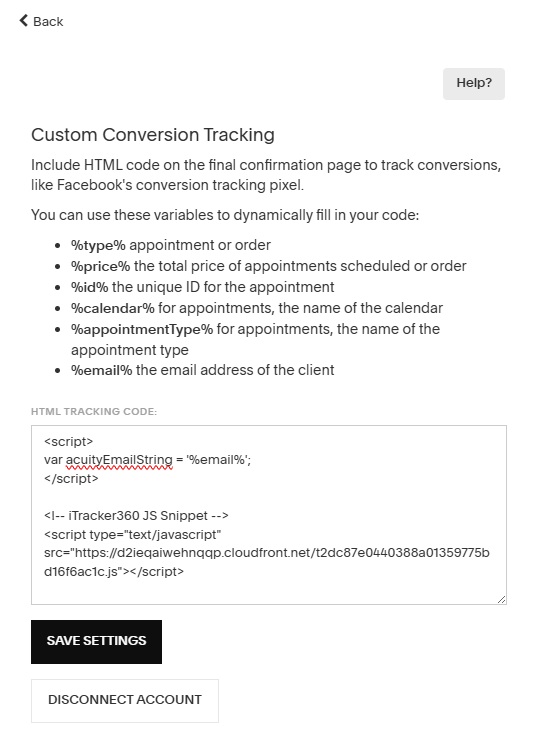
- Above the snippet, add the highlighted code you see below
<script>
var acuityEmailString = '%email%';
</script>

<!-- iTracker360 JS Snippet -->
<script type="text/javascript" src="https://d2ieqaiwehnqqp.cloudfront.net/t2dc87e0440388a01359775bd1c1c.js"></script>
Here is what the final result will look like in the conversion tracking code.

How does this work? Acuity Scheduling implements a custom conversion tracking method via a cross origin sandbox iFrame environment. They provide the ability to pass data from the scheduling form into this conversion frame. iTracker360 has all the necessary code to capture the relevant data and bubble up the tracking to the top of the page where your web page is at.
So make sure you include the iTracker360 JS code on your page and also add it to the custom conversion tracking area with the added highlighted code above the tracking snippet.
That should be all you need to do!