Note: You must have a ScheduleOnce professional account that allows you to create custom fields for this to work.
Are you using ScheduleOnce to capture new leads and need to capture the LeadSource? iTracker360 has built-in support for that and should work as long as you have a ScheduleOnce account that supports custom fields.
Here are a couple of screenshots of where you can capture this data:
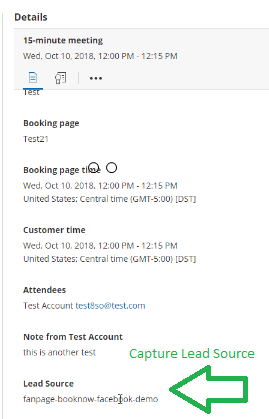
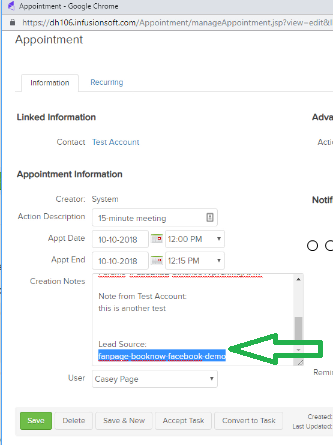
Lead Source captured inside Infusionsoft Appointment
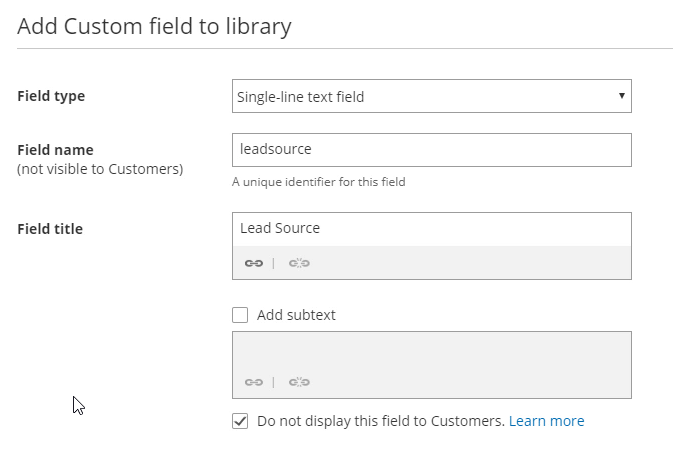
Step 1: Create the ScheduleOnce “leadsource” custom field.
Inside the ScheduleOnce “Fields Library” -> Create a custom field called “leadsource”. Set the Field Title and check the box “Do not display this field to Customers.”
Step 2: Add the “leadsource” field to your booking form.
Add the new “leadsource” field to your booking form. Verify that the field is not visible to customers. Save your booking form.

Step 3: Test your booking form
That should be it. Just create a sample URL with UTM parameters and give it a test. The LeadSource data should flow through to your ScheduleOnce activity stream as well as into the Infusionsoft Appointment Notes.
Note: The Infusionsoft LeadSource field is set by ScheduleOnce, so we are not able to change that, but we can capture this data into the appointment notes using a ScheduleOnce custom field.